How to Use the BeeSign API
Automate your signature workflows programmatically. Learn how to create an API key in BeeSign, authenticate with a Bearer token, and make your first request from Postman or cURL.
Mustafa Abusharkh

Everything you can do in the BeeSign dashboard — uploading documents, sending them for signature, downloading completed files, working with forms and templates — you can also do programmatically through the BeeSign API. That means you can wire signing directly into your own product, CRM, or internal tooling without anyone ever logging into the dashboard. In this guide, we'll create an API key, authenticate with a Bearer token, and make our first request from Postman.
Step 1: Open "Manage API Key"
From your BeeSign Dashboard, click your profile icon in the top-right corner to open the account menu, then click "Manage API Key". This is where you create, view, and revoke the API key that authenticates your requests.
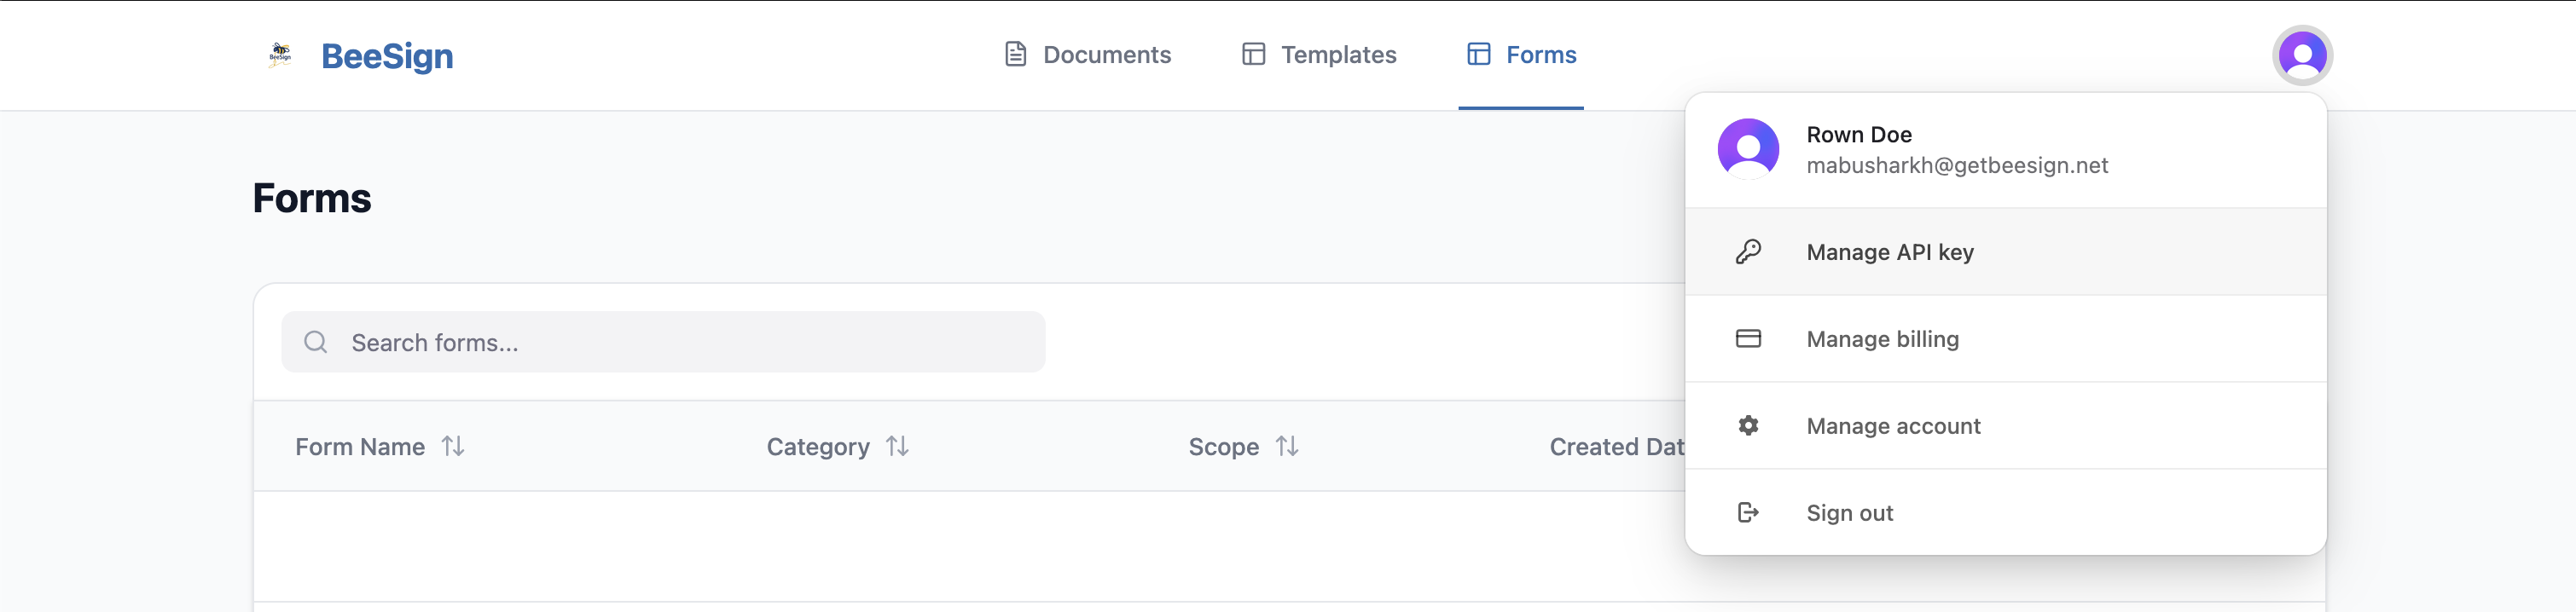
Your API key acts on your behalf. If you're working inside an organization, the key grants access to the API on the organization's behalf — so the documents, forms, and templates it can reach are exactly the ones in that workspace.
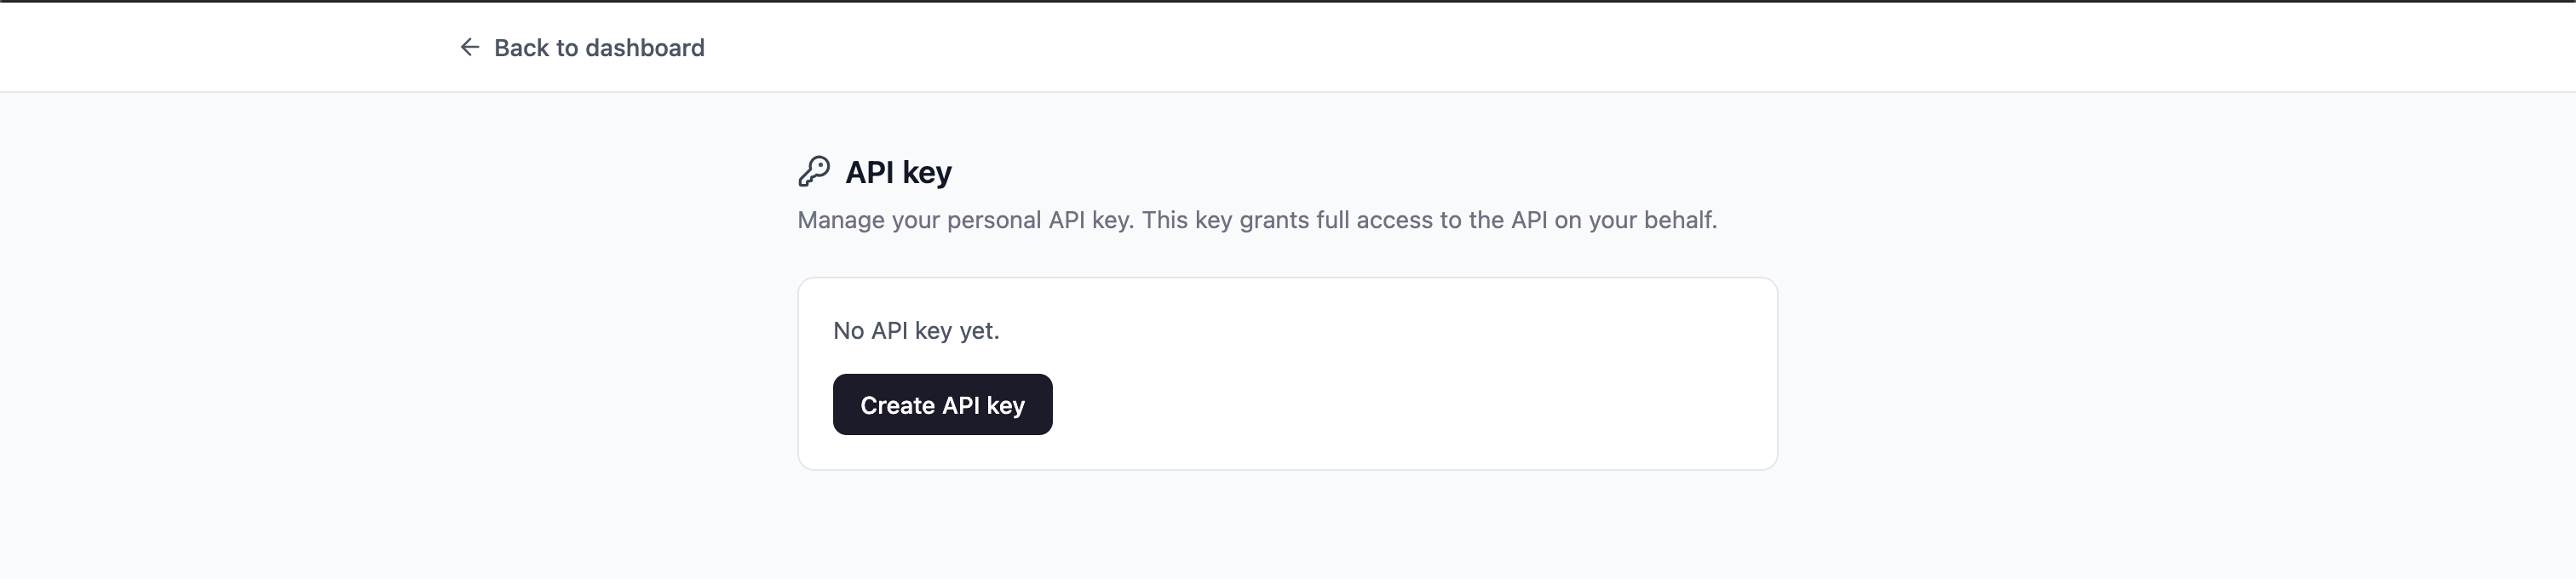
Step 2: Create an API Key
If you don't have a key yet, click "Create API key". BeeSign generates a fresh, secret key tied to your workspace. You only need one key — it grants full access to the API, and you can rotate or revoke it from this same screen at any time.
Step 3: Copy Your API Key
As soon as the key is created, BeeSign shows it once. Click "Copy" and store it somewhere safe — a password manager or your app's secret store. You won't be able to see it again; if you lose it, you'll need to rotate the key and update wherever it's used.
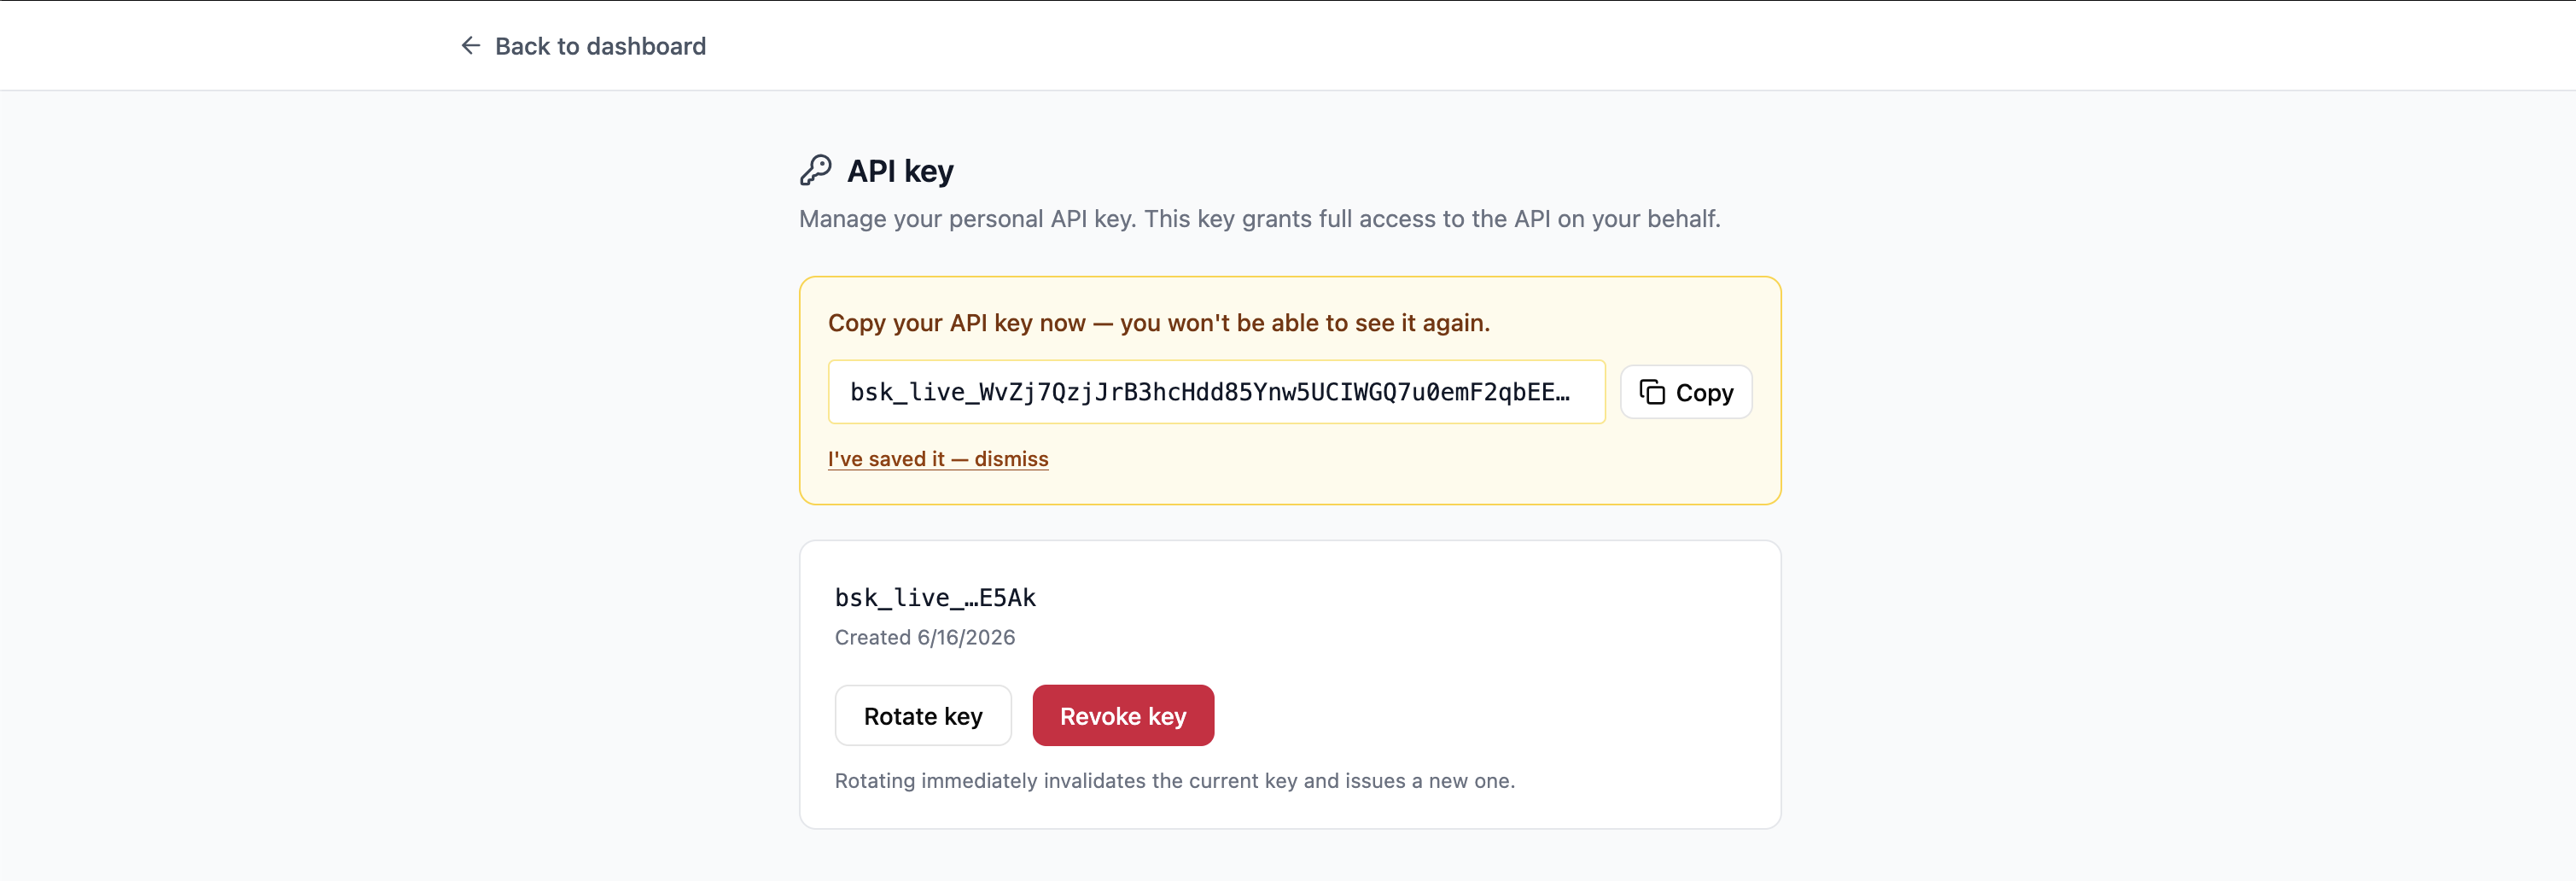
Treat this key like a password. Never commit it to source control, embed it in client-side code, or share it in a screenshot — anyone with the key can act on your workspace.
Step 4: Make Your First Request
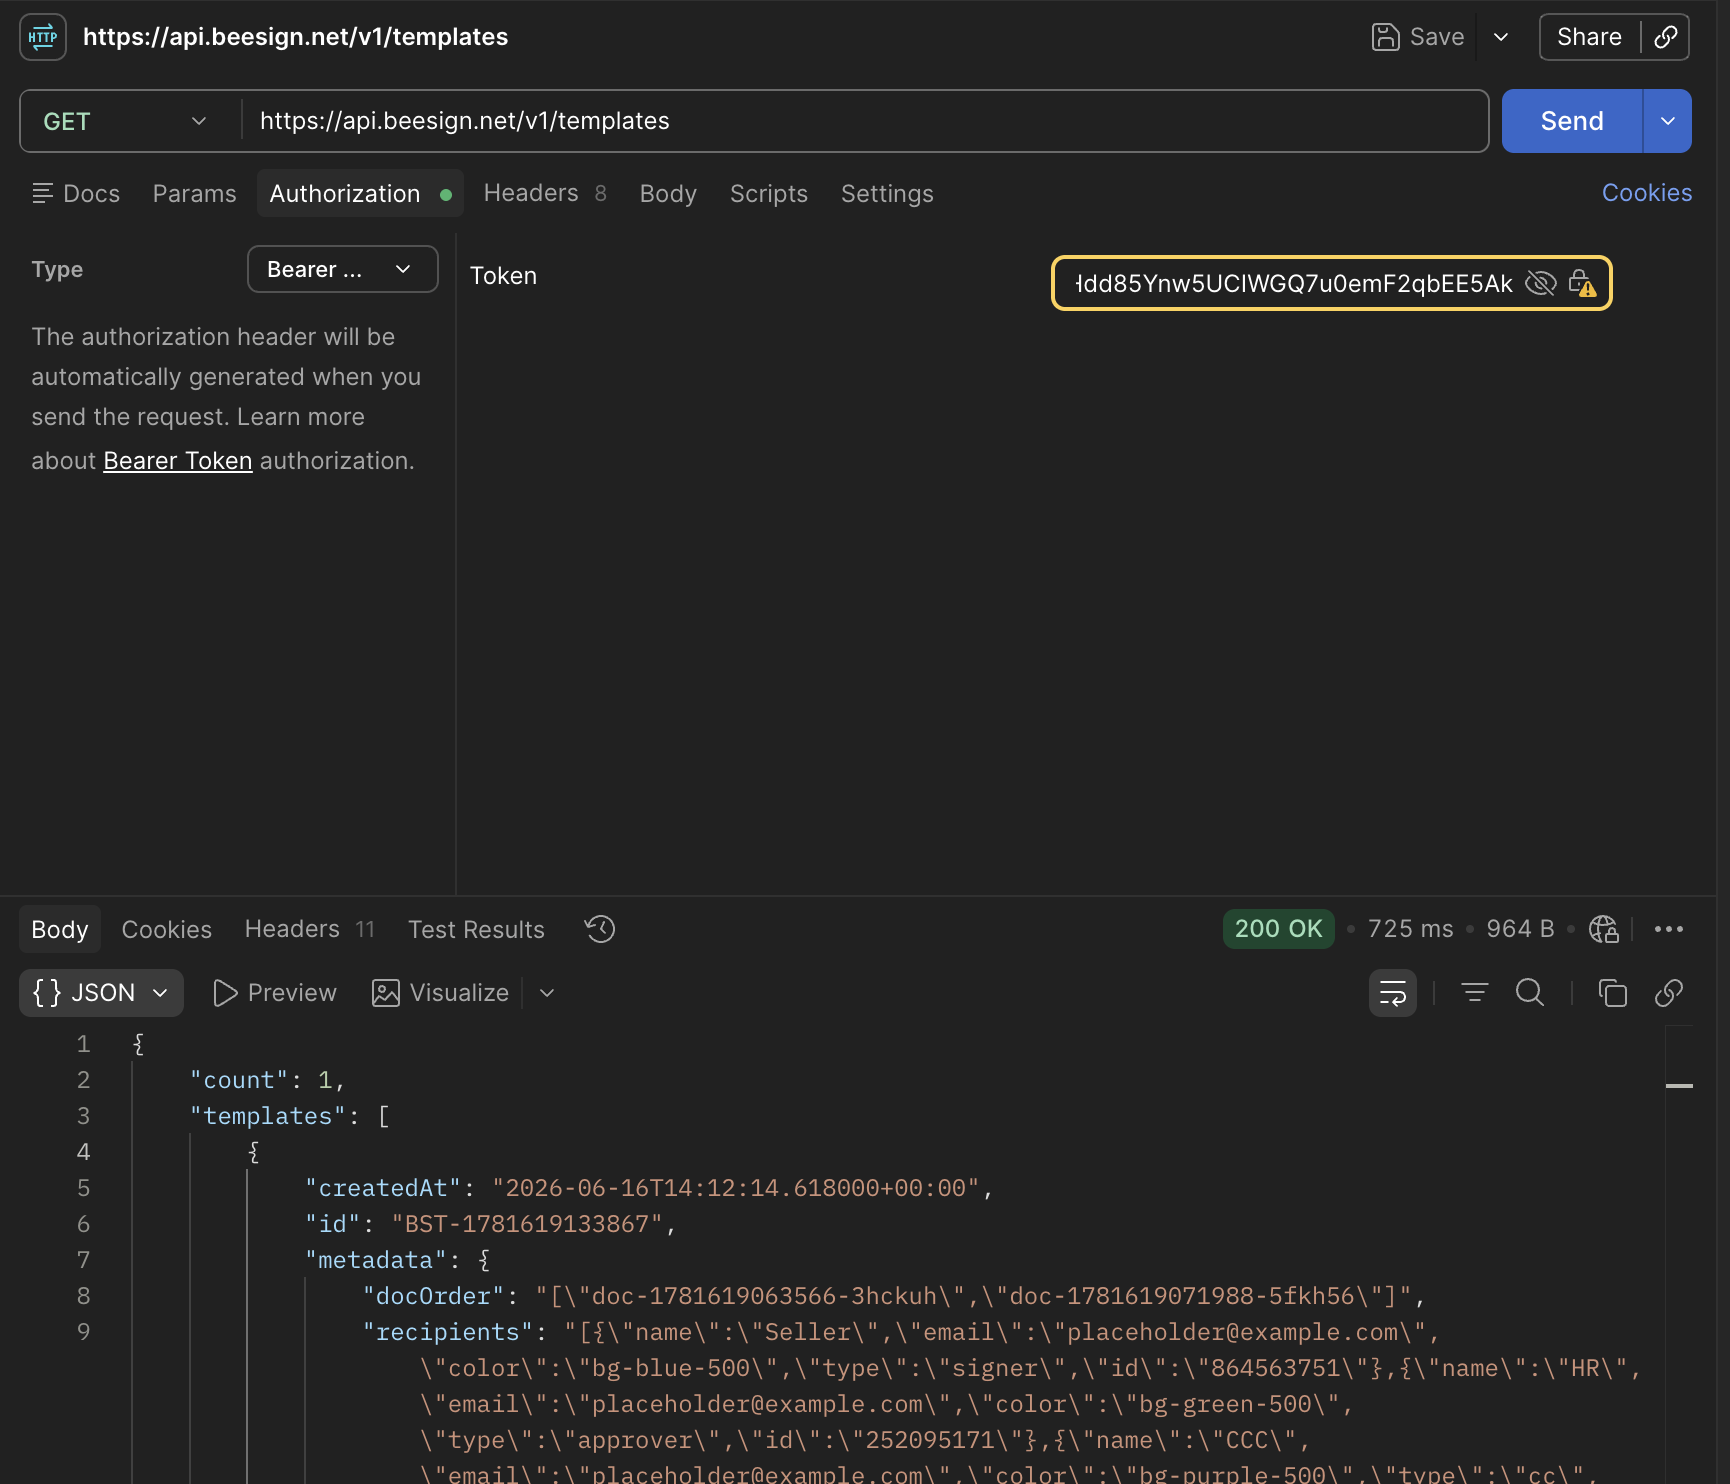
The BeeSign API lives at https://api.beesign.net. Every request is authenticated by passing your key as a Bearer token in the Authorization header:
Authorization: Bearer YOUR_API_KEYIn Postman, create a request, open the Authorization tab, choose the Bearer Token type, and paste your key into the token field. Then point the request at an endpoint — for example, listing your documents:
Prefer the command line? The same request with cURL looks like this:
curl https://api.beesign.net/v1/documents \
  -H "Authorization: Bearer YOUR_API_KEY"
A successful call returns JSON. If you get a 401 Unauthorized, double-check that the header reads Bearer followed by a space and your key, and that the key hasn't been revoked.
What You Can Do with the API
Once you're authenticated, the same Bearer token works across every endpoint. The API is organized around the same building blocks you already know from the dashboard:
- ✓Documents — list, retrieve, download, and delete the documents in your workspace.
- ✓Forms — upload reusable PDFs, list them, and pull them back down.
- ✓Templates — list templates and use a template to spin up a brand-new document for signature, all in one call.
For the full list of endpoints, parameters, and example responses, head to the BeeSign API documentation.
Recap: From Zero to Your First API Call
- 1Open "Manage API Key" from your profile menu.
- 2Create an API key for your workspace.
- 3Copy the key and store it securely — it's shown only once.
- 4Send a request with the key as a Bearer token — from Postman, cURL, or your own code.
That's all it takes to start automating your signature workflows with BeeSign. Generate a key, authenticate with a Bearer token, and you're ready to build. Sign up for free and make your first API call today.
Ready to transform your workflow?
Start using BeeSign today and experience the future of document signing